
Making huarraches was easy. Now, time to get to the hard part: tying them to your feet. This is where shoe wearers have the advantage. Shoes go on either three ways: slip on, tying them or velcro. But with huarraches, there are dozens of ways to tie them. There is no right or wrong way. The way I am going to show you is just one way and I actually modified this from another system. Best thing to remember after this is that, if you feel discomfort, is modify the process until you are comfortable. That may mean tightening in one place, loosening in another or changing the way the shoes goes on all together. It really is up to you and your feet.
One thing I want you to remember and it is important (so important, I started a new paragraph) is to write down what you have done. It would be a shame to find the perfect process only not to be able to replicate it the next day.
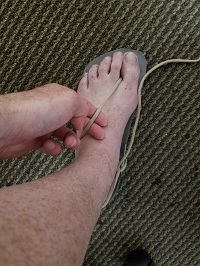
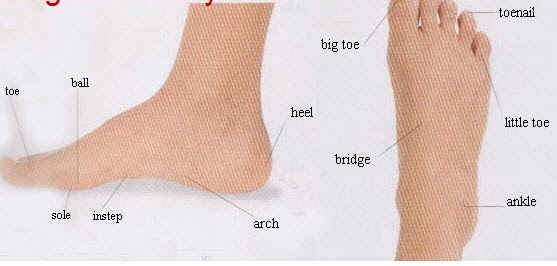
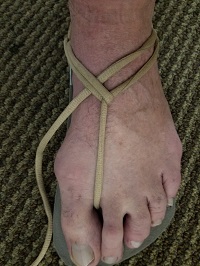
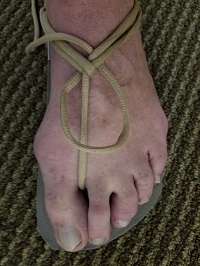
First, put your foot into the huarrache. Make sure the lace is between your big toe and second toe. You want about a finger of room between the lace and bridge of the foot. Too tight and there will be friction and blisters.
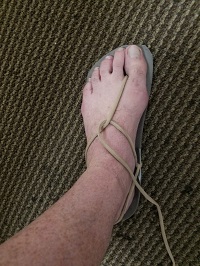
Loop the lace under and around the lace on the bridge of the foot. The lace should be pulled toward your instep. You want to make this somewhat tight (but not so much as there is pressure on your big toe).
Slip the lace under the heel strap. Pull tight enough that it feels comfortable. Once again, too tight and this will cause friction.

Pull the lace under the first string that crosses the bridge to the instep and pull. The lace will now join the heal strap to the instep strap. Make sure it is comfortably secure.
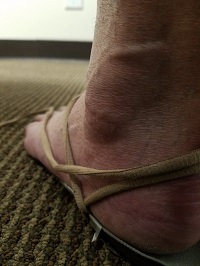
Wrap the lace so that it is above the heel strap. You are, essentially creating another heel strap. The heel straps should be secure without being too tight.
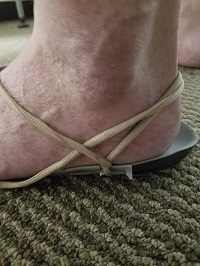
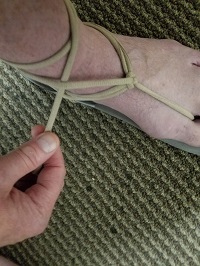
Slip the lace under the portion that connects the outside of the foot to the bridge and toes. Point the lace to the heel.
Slip the lace underneath the bottom heel strap and pull toward the big toe. Tighten until it is comfortable.
We have come full circle. Back to where we started. Slip the lace under the first two strings you worked with. wrap the lace across the bridge of the foot.
I am looking at my feet in these pictures and, God, they are ugly! But I digress…
Shove the lace under the other two strings that are running across the bridge of the foot. A loop will be created.
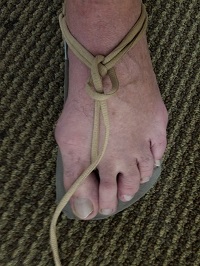
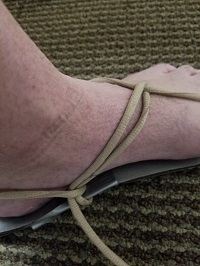
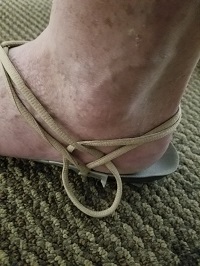
Push the lace through that loop and pull until comfortably tight. This will create a knot. Depending on the length of the lace you used, you might have extra lace. If you only have a little, you can just tuck it in someplace. I like a lot of extra lace because I want more support without making the huarrache tighter. So I use a 48″ lace and wrap the remaining twice around my ankle.
I then tie a knot around the base of the extra lace. Now, a huarrache is suppose to be loose on the foot. It makes it more comfortable. But, being a shoe guy for so many years, I still want to feel that it is securely on my foot (though it has never fallen off before. It is just my preference).
A few things to remember. First, do not fear adjusting. Maybe you do not like a lace looping here or there. Experiment until it is comfortable. I went through four different lacing methods before I settled on this one. And this is a hybrid. Look at YouTube and see the different ways there are to do it. Next, if running and the lace feels kind of tight in an area (causing friction or pinching something), try giving the string a little tug. That should loosen it the lace. If you are still experiencing discomfort, you may have to stop, undo the lace and start over. I have had to do this several times. But once I became used to tying the laces, I have not had to do this.
I hope my description was helpful. Leave a comment if you have any questions.
Picture courtesy of:
|kidspicturedictionary.com
