
Huaraches are simple to make and inexpensive. But, not only that, they can last a very long time (mine have lasted longer than most of my shoes. Though I did not scour the roadways looking for tire treads, there are other materials that can be used to make these last a long time (thank God for duct tape). All you will need to a pair on insoles (ones bought from a grocery store or ones from an old pair of shoes. I have used both), shoelaces that are 36″ to 48″ in length, scissors and duct tape.

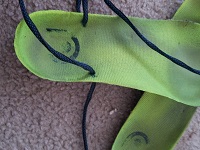
First get yourself some insoles. The above are from an old pair of running shoes. My current set is made from Dr. Scholl’s comfort insoles (I like those). You will then need to measure them out for placement of the laces. You do this by stepping on the insole and, with a sharpie, marking the locations that will be used for the laces.
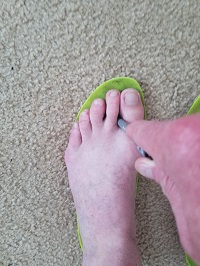
You will mark the spot on both sides of the insole just in front of the ankle bone. Make sure the marking is not too close to the edge. If too close, the friction of the lace may tear the edge of the insole (though there is a solution for that also). Next, mark a spot in between the big toe and the second toe. Make sure the hole is between the webbing between the toes and the first knuckle. If the lace is too close to the webbing, the lace may rub against the webbing and create blisters.
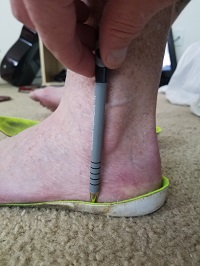
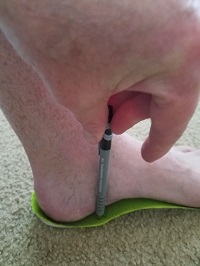
Once you have marked the locations that the lace is to go through, take a sharp instrument and poke holes. Try to make the holes as small as possible.
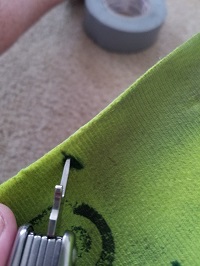
Take you lace and tie a knot at the end.

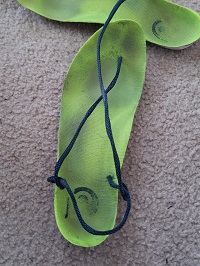
Pull the lace through the toe hole from the bottom of the insole. You might think that the know will get in the way while running, but it will not. 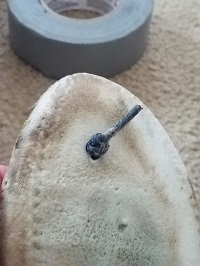
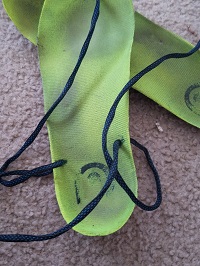
Next, bring the lace toward the opposite of the instep of the sole. Push it through hole on the top of the insole.
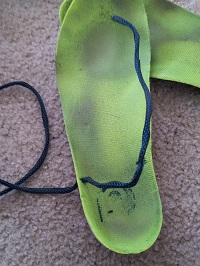
Loop the lace around creating a loop around the hole.The lace should be point toward the heel of the insole.
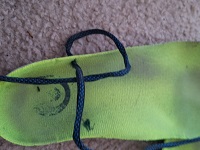
Poke the lace through the top of the insole on the instep. You have just created your heel strap.
Loop the lace around the portion on top of the insole.
You have finished the lacing of the huarache. Hard part done (and it was not that hard, right?).
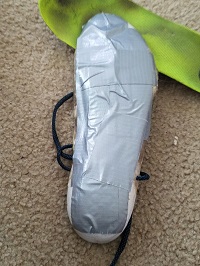
Now to make these things street tough. Take a strip of duct tape and have in go all the way down the bottom of the insole.
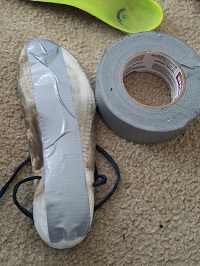
Continue adding tape until you cover the insole. It is not important that you hide the entire bottom. Just the parts where your foot touches the ground. You will need only to add a layer or two. The duct tape can take a beating.
There are a couple of things to remember. First, if the duct tape begins to wear out, no problem, add more. Second, in order to avoid tripping, you may need to cut some of the toe portion of the insole (now a sandal). If you have too much material past your toes, it will get caught on the ground and you will trip (trust me, I know). Finally, the the holes where the laces are get a little worn down, remove the laces and cover the holes with duct tape (make sure you mark the location of the holes before you do that.
That it it! I have made four of these for my last ultra marathon (I only used one pair). They are sturdy and will give you the freedom of running barefoot. My last entry will be how to tie these to your feet.
